| |
| Star Wars: Legion Commando | |
|---|---|
| Publication information | |
| Developer(s) | |
| Publisher(s) | |
| Release date |
October 2009 |
| Genre |
First Person Shooter |
| Modes |
Single Player campaign, multiplayer, online multiplayer |
| Platform(s) | |
| Chronology | |
| Timeline | |
Star Wars: Legion Commando is a First Person Shooter where you play as an unnamed Legion Defiler in the service of the criminal organization known as the Steel Legion, and perform various missions of assassination, theft, sabotage, and extortion. The gameplay and feel is quite similar to that of Republic Commando, in the way that the tone and environments of the game is quite gritty.
Violence in the game is very realistic and intense for a Star Wars game, with mild gore and realistic physics included. Most enemies will bleed or will emit blood when shot, and acts such as pushing an enemy into a fan or shooting them with a shrapnel gun will result in equally gory messes. Despite this overall dark feel, the game does have a wry sense of humor, and various subtle references to other media abound in the game.
The story concerns the Defiler's increasing role within the Legion and the part he plays in its reign. It is set during the height of the Legion's reign, a short while before the Battle of Yavin, and chronicles the Defiler's various tasks as he gains further recognition in the eyes of the Legion upper circle. Throughout the storyline, the player visits several famous locations in the Star Wars universe, such as Naboo, Coruscant, Tatooine, and even the Death Star, and it climaxes at the fall of the Legion. Other characters, such as Tyber Zann and Darth Vader, make cameos in the story.
Development[]
The development of the game came about when Pandemic Studios was approached by LucasArts for developing a new FPS set in the Star Wars universe. Following the release of its controversial title 'Taliban Hero: Kill All Americans', Pandemic was more than willing to accept the contract. After initial discussion about the game's content and setting, Pandemic initially thought of making another Jedi Knight or Battlefront title, before deciding to go into the underworld of the Star Wars universe. It was agreed for the game to revolve around the Steel Legion organization, although at first the game was to be a Mercenaries-type affair, with the player given a full-roaming environment with the option to join various factions. Due to time constraints, however, it was decided to just make it a more straightforward FPS.
Storyline development progressed quickly. It was agreed to make make the main character a silent protagonist, although this was because the developers had planned to give the player the option to fashion their own character, a feature that was ultimately dropped out. Due to pressure from fans, who were feeling that the latest Star Wars video game releases had been lackluster, gameplay was prioritized over storyline. Multiplayer was initially constituent of little more than a simple deathmatch option, but the studio decided to give it more attention following Lucasart's desire for more online Star Wars games.
To reflect the game's grittier setting, the developers agreed to introduce intense violence and moderate gore. Some fans misinterpreted this statement, with some complaining that the game would be ' 'Star Wars meets 'Manhunt', but the developers insisted that gore would not be overly intense. Nonetheless, there was a small online petition to boycott the game, which did not make much progress.
Throughout development, the developers often questioned the fan community for what they wanted out of the game. Squad gameplay was heavy in earlier iterations, but was eventually dropped out. Vehicular combat was also minimized, but not completely removed. RPG-style XP upgrading was also introduced late in development.
Finally, betas were released in summer 2009, and were met with satisfaction from the fan community. Voice acting and sound effects were left to the last minute, which meant that there was a rush to find voice actors. In the end, actors from previous Star Wars games were recruited for the project, and cutscenes were concurrently given a last-minute trim. Once the chief programmers were satisfied that they had done all they could, the game was released for sale in October 2009.
Gameplay[]
Gameplay ranges from stealth levels where not getting seen is the priority and all-out battle levels were subtlety is not necessary. Depending on the level, enemies can either be numerous or weak or small in numbers but strong. Minigames are also present in some levels, and vary in difficulty; usually, they are Tetris-like hacking minigames.
There are no health packs as such; as in Halo 2; health recharges when you are not taking fire, although it will stop recharging if you do. The Defiler's armor, however, can be improved with items found in levels and with upgrades. Also, with upgrades, the Defiler's armor can provide useful abilities in battle, such as night vision and EMP pulses than can disable enemy weaponry.
In a similar way to Halo 2 and GoldenEye: Rogue Agent, you can hold two weapons in both hands, although larger weapons will require both hands to hold. You can also take human shields using any NPC, including your own allies. A player will not get penalized if he or she do this. Melee attacks are also doable--if the player manages to get sufficiently close to an enemy, they can either stab them with a wrist-knife or punch them down.
Sometimes, if you sneak up on an enemy and put your gun up to them, they will often drop their weapon and surrender. If this happens, you can either accept their surrender or kill them. If you accept their surrender, they will give you either ammo or health, and will not attack you. If you kill them, you will get extra points at the end of a level.
At the end of a level, you will be evaluated on a number of aspects, these being Accuracy, Kill Count, Stealth (i.e. a count of how many enemies were aware of your presence), Destruction (i.e. how many structures and objects you destroyed), and Ruthlessness (i.e. how many surrendered enemies you killed, and how many human shields you took). If you do well in all of these aspects, you will gain points that you can spend on upgrading your character.
If the player gets stuck on any level, they can contact and consult advice from Jandek Martel, who serves as an advisor in the game. However, there is a limit to how many times the player can ask advice; if they ask too much, Jandek loses patience and severs his contact for the rest of the level.
Weapons[]
- WESTAR-M5 blaster rifle. This is your standard weapon and you are automatically equipped with it at the start of each level. It deals moderate damage, but can be upgraded over the course of the single player campaigns, with modifications such as paralysing electrodes and poison dart ammunition.
- Thermal detonator. You are equipped with five of these at the start of each level and can collect more from downed enemies. There are two types of Thermal Detonators: ones that explode instantly upon contact, or ones that can be remotely detonated. Most detonators can be fixed to enemies, and doing so will result in gory results.
- DC-15s side arm blaster. This blaster does a medium level of damage and can be held in both hands, and has unlimited ammo. The player starts out automatically equipped with one at the start of each level. Like the WESTAR, it can be upgraded with unlockables such as armour-piercing bullets, and an overclock system which results in a massive burst of energy that results in the gun being overheated for a few moments.
- E-11 blaster rifle. This weapon can be taken from any downed stormtrooper and is one of the more common weapons in the game. Although not particularly powerful, it has a very large clip compared to other weapons and reloads the fastest.
- Reciprocating quad blaster. This is one of the most powerful weapons in the game, but quite rare and inaccurate. It can make short work of almost any enemy, but overuse will result in it overheating and even exploding.
- PLX-1 portable missile launcher. This is the more common missile launcher in the game. It is not particularly powerful, but has a large ammo clip and is fairly accurate. Unlike the other missile launchers available, it can fire any explosive ordnance the player finds.
- E-5s sniper rifle. This is the standard sniper rifle of the game. It has a very long range and is quite powerful, despite being not very accurate. If the player buys a certain upgrade, it can be used as a rapid-fire weapon at the expense of ammunition.
- DC-15S blaster. This blaster can be taken from enemy mercenaries and whilst relatively weak, it does have a large ammo clip and has a fast rate of fire. The player can fix a bayonet to it if necessary.
- MiniMag PTL missile launcher. Although more powerful than the PLX-1, the PTL is much rarer, although it can easily make short work of any vehicular enemy. However, it can only be used with certain types of missile.
- DXR-6 disruptor rifle. This is one of the most powerful weapons in the game, and can vaporise any weak enemies in a single shot, and is effective against larger ones too. Two DXR-6s can be held in both hands.
- WESTAR-34 blaster pistol. This is the standard pistol of the game and has unlimited ammo, but is not very powerful. Two WESTAR-34s can be held in both hands to increase firepower. It can be thrown at enemies if necessary, although this is can be more comedic than effective.
- DT-57 heavy blaster pistol. This is a heavier pistol, and has a very large ammo clip. Two DT-57s can he held in both hands.
- DC-15x sniper rifle. This is the heavier but rarer alternative to the E-5s. It is more powerful and has a longer range, but a smaller ammo clip and a smaller rate of fire.
- GTR-66 shrapnel launcher. This specialized weapon launches bursts of sharp shrapnel, which can travel through enemies, and is effective against groups. Nonetheless, it has a small ammo clip and is not particularly accurate.
- MR-798 Mag-rail. Being very rare in the game, this weapon is capable of firing through walls and is equipped with an X-ray scope to do so. It is moderately powerful, but useless against vehicles or heavily armored enemies. It can also be used to down multiple enemies simulatenously.
- Electrostaff. This melee weapon can kill instantly, but it has a limited battery and can only be used up close. It is only available in multiplayer.
Vehicles[]
In several missions and in multiplayer, you can pilot various vehicles.
- Legion Assault Speeder. This vehicle is fast and good against infantry, despite being somewhat flimsy. It can turn invisible for a short period of time.
- 74-Z speeder bike. Featured in one mission, this zippy vehicle is very fast, but hard to control and very flimsy.
- MZ-8 Mobile Pulse Cannon. One of the heaviest vehicles in the game, the MZ-8 can easily devastate any other vehicle and has heavy armor, which makes up for its slow speed.
- AT-ST. Common in missions against the Empire, the AT-ST is fast and has a high vantage point, but is disadvantaged with inferior weaponry and armor.
- AT-AT. Very rare in the game, the AT-AT has very high firepower, but is extremely slow and has a poor turning speed.
Enemies[]
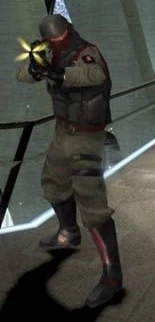
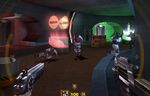
A typical enemy mercenary encountered in the game
- Stormtroopers. These are the most common enemies in the game and are armed with E-11 blasters and thermal detonators. Although not very powerful, they are often plentiful in number.
- Mercenaries. These are the second most common enemies in the game. Mercenaries will have varying types of weapons and levels of durability, although most of them are fairly weak.
- Storm commandos. Although quite rare, these elite enemy units are tougher and cleverer than most other enemies, and can snipe at the player from a distance.
- Phase III dark trooper. This enemy is encountered once throughout the game and serves as a boss.
- Scout trooper. Scout troopers are encountered in some missions and although weaker than stormtroopers, they are quicker and will make better use of their surroundings.
- Viper probe droid. Vipers are common in many levels and although they are generally weak, they can cause the player much damage with their self-destruct mechanism.
- Imperial commando. Imperial commandos are more elite than other infantry units and are quite numerous on many levels.
- Consortium Defilers. These are found in one level, are very elite and powerful, and are quite common. Their weapons range from machineguns to sniper rifles, and usually attack in squads.
- Sentry guns. Automated gun turrets of varying type and stength are found in most levels.
- Civilians. Civilians will be found in some levels, and while some are defenseless, others are armed and will attack if provoked.
Characters[]
- The Unnamed Legion Defiler, an enigmatic and mysterious Legion Defiler whom the player controls. Nominally assumed to be male, he remains a semi-silent protaganist throughout the game, saying very little, but his identity is revealed at the very end if the player achieves a high score.
- Unit 8311, the droid head of the Steel Legion, who dispenses missions for the Defiler. He appears usually obscured in shadows in cutscenes, and seems to have an affinity for the Defiler.
- Ferd Swqaru, a high-ranking Legion officer, whom the player meets with in one mission. He seems to view the Defiler with disdain and unprofessional.
- Jandek Martel, a Mandalorian mercenary who is in the service of the Legion, and provides advice in missions. At first, he acts abrasive and unfriendly, but forms an attachment to the Defiler as the game goes on.
- Senator Binks, a Gungan senator whom the player has to assassinate in one mission.
- Tyber Zann, head of the Zann Consortium, which rivals the Legion. The player does not encounter him, but is featured briefly in a cutscene, where he expresses rage at being humialated by the Defiler.
- Urai Fen, Tyber's second-in-command. He serves as a boss in one level, and is equipped with a cloaking device, blades, and can self-heal. Throughout the fight, he taunts the player, but says little besides.
Levels[]
Level 1: Sabotage the Bombardment[]
Cutscene[]
The Legion Defiler hero of the game is brought before 8311 in a dark room. 8311 explains to the Defiler that due to his exceptional skill demonstrated during training, he will undertake an important mission for the Legion. 8311 briefs the Defiler and tells him that he wants an Imperial-class star destroyer Bombardment above the planet Ando Prime sabotaged in order to intimidate an Imperial Moff in order to extort credits from him.
The scene cuts to a Sentinel-class landing craft approaching the orbiting Star Destroyer. A crewmember aboard the Star Destroyer asks the craft for clearance codes, which it gives. The Defiler is then revealed to be pilot of the shuttle.
The mission[]
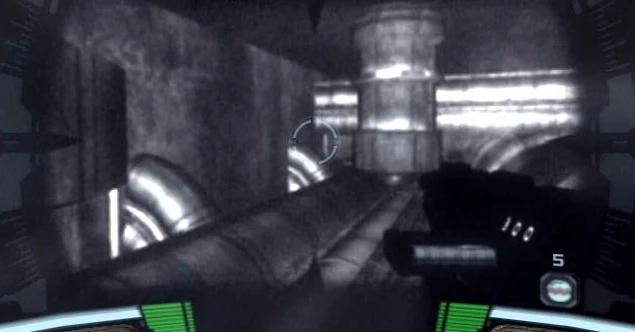
Infiltrating the maintenance area of the Bombardment
The player starts off inside the Sentinel, where he is free to get to grips with the controls and have target practice with some remotes. Soon afterwards, the Sentinel docks with the Star Destroyer, and the player has to use stealth to get through the hangar and avoid being swamped by the security forces there, with Jandek Martel contacting the player and guiding him along.
Once the player gets out of the hangar, he is free to choose stealth or simply go in all guns blazing. Due to the easiness of the level, either is optionable. The objective is to sabotage and overload the main reactor; the player gets there via lifts, corridors, and can choose to use ventilation shafts. Within these ventilation shafts, the player can activate night vision, which can unveil mynocks that attack the player but do not pose much of a threat. Going through maintenance areas is also an option, although the player can be hindered by noxious exhaust and security drones.
The player will then get to reactor control and can set the reactor to overload via a basic hacking minigame, which serves as a prelude for other minigames to be later played. The player then has ten minutes to escape via a monorail system and lifts, in a sequence that is akin to Metroid Prime, and will not encounter many enemies along the way. Once in the hangar, he can commander some Imperial vehicles there to take out the Imperials there, but this is optional. The mission ends when you reach the Sentinel.
End cutscene[]
The Bombardment explodes and the Defiler returns to Nar Shaddaa. 8311 congratulates him and says that he senses great potential in him.
Level 2: Assassinate Senator Binks[]
Cutscene[]
The cutscene begins with 8311 watching a HoloNet news report concerning Senator Binks of Naboo, who has been openly defying the Legion and calling for extra support against it. The Defiler then enters to report his success on the previous mission. 8311 then informs him that he has a new task: assassinate Senator Binks on Naboo during a conference.
The mission[]
The player starts off in an alleyway of Theed, and must infiltrate the Royal Palace. Several Legion Assault Speeders are available for use, and the player can use their cloaking devices to slip past cordons of mercenaries and Naboo soldiers guarding the Senator. He can then decide whether to charge in via the main entrance or use one of the side entrances. The main entrance is considerably more guarded but presents a quicker route to Binks, whereas the side ones are empty but will force the player to take more time getting there.
Once inside the building, the player will have to make his way to the throne room, where Binks is located. If the player explores the palace sufficiently, he will find a kitchen with food being prepared and is given the option to poison the food.
When the player reaches the throne room, Binks will either drop down dead due to the poisoned food, or he will notice the player and cry out. Here you can dispose of him any way you wish, and shooting him will result in a fairly gory display. Once this is done, you will have to escape via a window, and fight your way to the Theed hangar past mercenaries and guards and escape in an N-1 starfighter.
End Cutscene[]
The Defiler returns to 8311, and surprisingly, the HoloNet is announcing that Binks is still alive. 8311 speculates that the person killed might not have been Binks, or this one that seems to be still alive is a copy. Regardless, he congratulates the Defiler, and informs him that he is going to be promoted at this rate.
Level 3: Destroy the Vigo's palace[]
Cutscene[]
The cutscene starts with a Black Sun raid on a Legion building on Nar Shaddaa. The raid is repulsed, but damage is still done. 8311 discovers that a Black Sun vigo based on Nal Hutta was responsible, and wants him eliminated. He dispatches the Defiler to destroy the Vigo's palace and kill him by any means necessary.
The level[]
Fighting off Black Sun soldiers
The player starts off in the gardens of the palace, and stealth is advisable to avoid the searchlights and the patrolling guards. The player can then enter the palace via a sewage duct or a window. Once inside, he can either raid the armory or head straight for the Vigo, who should be in the throne room. Going through some ventilation ducts is optional at this stage.
Once the player reaches the throne room, he will have to take down the Vigo's elite guards. Then, a trapdoor will open and the Defiler will fall into a beast pit where he will have to fight a Nexu. This can be defeated easily if the player finds a heavy missile launcher in a nearby crate, upon which the Defiler remarks how conveniently placed weapons can be these days.
As soon as the player defeats the Nexu, he will make his way through the palace dungeons and can free prisoners to cause a distraction. Once he gets up to the main levels of the palace, a sub-objective the player can achieve is to get into the Vigo's computer chambers and transfer all his credits into Legion accounts.
Soon, the player will come to a hangar where the Vigo is attempting to escape in a solar sailer. He then has a moment to kill the Vigo before he boards the ship. The last objective is to place a bomb by the fuel storage, and then the Defiler escapes in the Vigo's sailer.
End cutscene[]
The bomb explodes and the palace is consumed by fire. The Defiler returns to 8311, who congratulates him and explains that thanks to him, even Black Sun fears the Legion.
Level 4: Raid the Banking Clan vault[]
Cutscene[]
The opening shot of the cutscene establishes a Banking Clan city on Muunilinst. Inside one of the buildings, a Muun controller is seen relaxing at a console when he is shot from behind. The Defiler then appears and manipulates some controls. A monitor is then shown displaying several Legion tanks bursting into the bank vault.
The level[]
The player then has to make his way to the vault through the bank, taking out security guards of varying strength.. Once he arrives at the vault, the player has to cover Legion droids packing up the money there from various waves of attackers, starting with various low-level thugs to eventually Imperial militia to stormtroopers. The player must mix melee attacks with firearms, are there is almost no spare ammo available in the level. If the player can find time, he or she can locate batteries scattered across the vault to activate auto-turrets to help you.
After defeating the final wave, an AT-ST will turn up, which serves as the boss. Taking it out is made more difficult due to the lack of heavy weaponry. The player does not have to defeat it, but has to prevent it from destroying the droids by distracting it.
Once the money has been taken away, the player has to escape the vault and get outside the bank by any means necessary before extra Imperial reinforcements arrive. During this time, the player can locate and kill some Muun civilians present for extra Ruthlessness points, although this can result in Muuns ganging up on the player and diverts attention towards himself. Also, the longer the player takes to escape, the more enemies he faces along the way.
A humorous extra also exists in this level. If the player sufficiently explores it, a door will be located that can only be opened by shooting it in the hinges. Inside, the player will find a disco with indestructible stormtroopers dancing, and can then get down in a DDR-esque minigame for a massive boost of extra points.
End cutscene[]
The Defiler watches the droids pack the money onto a Legion freighter, and is then told by a Legion soldier that the commander of the raid was captured during his escape. The Defiler informs 8311, who decides that the commander is too important to be forgotten about and tells the Defiler to head to the asteroid prison of Oovo IV.
Level 5: Infiltrate Oovo IV[]
Cutscene[]
A freighter approaches the asteroid of Oovo IV, and is hailed by the controllers of the asteroid. The pilot of the freighter reports that he is bringing in a fresh supply of toilet paper, and transmits authorization codes. The codes match, and the freighter is allowed to dock with the asteroid. The Defiler is then revealed to be pilot of the freighter, and as he enters the asteroid via a docking tube he mutters how easily deceived people can be.
The level[]
This level is generally a stealth mission, as there are sentry guns located in almost every location and if spotted the player will have to contend with overwhelming amounts of enemies. Fortunately for the player, the prison is full of shadows. After making way through the spaceport, which is empty save for droids that the player can shoot, the player will have to enter some mining tunnels filled with dangers such as rockfalls and energy spiders.
Eventually, the player will reach the prison block, and can either go straight in or use the ventilation system, which happens to be infested with womp rats. If the player chooses, he/she can release prisoners as a distraction, but this will heighten security later on in the level.
The player will soon reach the maximum-security block, which is guarded by storm commandos. If the player is patient enough, he can ride a hover sled straight through this section of the level. He will soon find the cell where the Legion commander is being held, and has to play a hacking minigame to free him. Once that is done, the Defiler will release all prisoners to start a riot, and will have to make his way to the nearest spaceport. Along the way he will have to defend the commander, who can be given a weapon, from security teams and rampaging prisoners.
At the end of the level, in the spaceport, the Defiler and commander will rush towards a waiting freighter only to be stopped by a Phase III dark trooper. This serves as the boss and is easier to defeat if the player can maneuver it next to explosive fuel tanks, which will severely drain its health when detonated. Once it is destroyed, the level ends.
End cutscene[]
The Defiler and commander fly out in the freighter and jump to hyperspace. Contacting 8311, the Defiler informs him that the mission is a success. 8311 again praises him, but reminds him that this means that he will soon be undertaking even harder missions. Undeterred, the Defiler states that his loyalty is to the Legion alone.
Level 6: Intimidate Halton[]
Cutscene[]
The Defiler enters a room with Ferd Swqaru, one of 8311's more favored minions, present. Ferd informs the Defiler that there is no rest for the wicked, and that he has another mission. He informs the Defiler that he is to find the young billionaire heiress Taris Halton in her apartment on Coruscant and intimidate her into funding Legion operations. The Defiler says that he will enjoy this mission.
The level[]
The player starts in a Coruscant spaceport in the night, with Coruscant nightlife underway. If the player so desires, he can shoot nearby passersby for extra Ruthlessness points, but this will soon attract the attention of Imperial militia, and if the player does not evade them more forces will come. Jandek chips in and informs the Defiler that he will have to locate a Legion contact in a nearby cantina and extract clearance codes to Halton's apartment, and advises him to stay low.

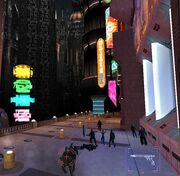
A picture of part of the level
After locating the cantina, the Defiler finds the contact, who is getting drunk with some prostitutes, and after some difficulty manages to gain the codes from him. However, this ends up in a bar fight, and the Defiler must fight off various drunk enemies of varying strength. Using bottles on the bar as weapons is an option. After defeating the drunk bargoers, the Defiler exits the cantina and Jandek states that he must now head to Halton's apartment, which is at the top of the spacescraper he is on.
To do so, the player must make his way through the gritty seedy area, which is filled with brothels and strip clubs and the like. If the player walks in the open, his armor might provoke some thugs belonging to Legion-rivaling organizations into attacking him. However, they will generally be easier to defeat. The player will also have the option to mug passers-by, gaining further Ruthlessness points.
Eventually, the Defiler will find a turbolift that takes him to the top of the spacescraper, where Halton's penthouse is. Once he arrive there, he enters the apartment and finds Halton grooming herself in a mirror. The player can have the option of beating up Halton and inflicting other physical torture on her, or simply threatening her and using verbal put-downs. Either way, Halton is successfully intimidated, but as the Defiler is about to leave, a bodyguard bursts in and manages to call for back up before the Defiler shoots him down. Jandek chips in and tells the Defiler to head to roof for pickup.
The Defiler arrives at the roof, but then an Imperial LAAT/i turns up, which serves as this level's boss. It attacks the player with beams and missiles and also deposits stormtroopers on the roof. The player, lacking heavy weaponry, must aim at the cockpit to take out the pilot. Once this is done, the level is over and a Legion transport arrives.
End cutscene[]
As the Defiler leaves Coruscant in the transport, he gets an incoming message from none other than Tyber Zann, head of the Zann Consortium. Zann informs that he has heard of the Defiler's skills and offers him a job in the Consortium in return for a larger salary. The Defiler declines, saying that he is loyal to the Legion alone. Zann then reveals that his technicians have hacked the transport's controls and that it is now on a route to the Consortium's headquarters on Ryloth.
Level 7: Escape from Ryloth[]
Cutscene[]
The Legion transport exits hyperspace above Ryloth and descends into the atmosphere. It lands on a landing platform in the middle of a large canyon, and is surrounded by Zann Consortium troops. Exiting the transport, the Defiler demands what the meaning of this is. Suddenly, a red-armored Consortium Defiler appears and informs him that Tyber Zann wishes to prove the Consortium's Defilers as being superior to those of the Legion's, and that he wants 8311 to have the humiliation of losing one of his best troops. The Legion Defiler whips out a gun and announces that Zann will pay for this.
The level[]
Immediately, the player has to defeat the surrounding Zann Consortium thugs and defeat the Consortium Defiler, who manages to call for reinforcements before the player shoots him down. A squadron of dropships will appear, and then a cutscene is triggered where the Defiler hops onto a nearby 74-Z speeder bikes and drives off down the canyon, starting a vehicle sequence. The player will have to avoid rocks falling from the canyon walls and Consortium fire.
After reaching the end of the canyon, the Defiler finds himself standing before a Consortium Palace. Several Consortium Defilers exit the palace, and the player will have to resort to ducking and covering behind nearby rocks and crates to defeat them all. Once they are taken out, the Defiler enters the palace, avoiding several sentry guns.
Inside the palace, the Defiler gets a communication from Consortium second-in-command Urai Fen, who mocks the Defiler and warns him that he will not leave alive. The player will have to navigate the corridors of the palace, and if the player searches enough he can find a room from where he can deactivate the sentry guns after a hacking minigame.
Eventually, the player will reach the roof of the palace, where he finds a hologram of Tyber Zann that mocks him and tells him that he is just little more than a man in blue armor. Then, Urai Fen himself will uncloak beside the Defiler and swipes at him. The Defiler manages to dodge him and a fight begins on the roof of the palace, with Urai serving as the boss. Urai will regenerate health after regular intervals, and will occasionally cloak, but the player can work around this by noticing how footprints appear on the dust atop the rooftop. Eventually, Urai will call in a dropship and hop aboard it after leaving a bomb. This triggers a cutscene, where the Defiler rappels off the palace as the bomb explodes, consuming the roof. Landing on the floor, he finds a Consortium shuttle.
End cutscene[]
Consortium troops and Defilers rush towards the palace. The Defiler ignites the engines of the shuttle and mows them down with its weapons, before taking off. Several Consortium StarVipers give chase, but the Defiler activates a cloaking device built into the shuttle before jumping to hyperspace. Then, the cutscene switches to Urai Fen entering a dark room with Tyber Zann himself present, telling him that he has failed. Zann says that it does not matter, and that he will exact revenge on the Legion someday.
Level 8: Steal the Laus[]
Cutscene[]
The Defiler arrives back at Nar Shadda where he is met by Jandek, who informs him that 8311 is pleased that he has humiliated Zann. He then goes on to tell the Defiler that Jabba has managed to locate an old artifact known as the Laus, which is going to auctioned off at his palace on Tatooine. He states that the Empire will probably pay big money for the Laus, and that it should fall into Legion hands. The Defiler guesses that Jandek wants the holocron stolen, and then asks if 8311 approves of the mission. Jandek says that 8311 isn't even aware of the Holocron, and that stealing it for him should please him. The Defiler then states that he has a point, and the scene cuts to a Legion shuttle landing in a canyon, with Jabba's palace in the background.
The level[]
The player begins in a rocky canyon, which is dotted with Womp rats, baby Krayt Dragons, and Tusken Raiders. Depending on the player's style of play, these hazards can be avoided for extra Stealth points or killed for Kill Count. Once the player gets close to the palace, Jandek calls in and tells the player to use stealth as to avoid being spotted by snipers on the palace. He also tells the player that there are some nearby caves that will lead underneath the palace, but that Jabba is probably aware of them. The player then has to make his way to a nearby cave entrance, avoiding laser sights from Jabba's snipers.
Once inside the cave, the player will find it filled with trip mines and sentry guns, which can be avoided by sticking to the shadows. Firing off too many shots in this section could result in a cave-in. After making way through the initial cave section, the player will find a nest of eggs. If the player shoots these eggs, a Krayt dragon will turn up, but can be defeated if the player manages to land a shot between its eyes. As the dragon dies, it smashes open a section of wall, making a passageway that leads into one of Jabba's dungeons.
Inside Jabba's dungeons, the player can release the prisoners to cause a diversion, or simply ignore them. If the player manages to hear a conversation between two guards, he will learn that the Laus is located in a vault beside Jabba's beast pit. Jandek will then call in and provide directions to getting there, based on plans of the palace.
After navigating the dungeons, in which the player must be careful not to raise the alarm, he will find a steel door leading into the vault, and a hacking minigame will commence. Once this over, a cutscene will play with the Defiler cautiously entering the vault with the Laus in the middle, using an infra-red visor to reveal lasers. After using an EMP grenade to disable them, the Defiler will grab the Laus only for the doors to slam shut.
The ceiling of the vault will slid open to reveal Jabba and his court looking. Jabba laughs, and announces that another thief foolish enough to try and steal the Laus has failed to recognize old-fashioned cogs. A door slides open and an Acklay will enter the vault, pulling down the Defiler as he tries to rappel out of the vault. and serves as the level's boss. Due to the lack of cover in the vault, the player will have to keep constantly on the move, shooting the weak spot on the Acklay's head. Once the Acklay has been defeated, the Defiler rappels out of the vault into Jabba's throne room, and aims a gun at Jabba. A shield drops between Jabba and the Defiler, and then the player has a time limit to escape before too many of Jabba's thugs arrive.
End cutscene[]
The Defiler takes off Tatooine, with the Laus. 8311 calls in and states that he is surprised that such a loyal minion would so such a thing without being told to do, but the Defiler tells him that it is for the good of the Legion. 8311 pauses, then tells the Defiler not to return to Nar Shaddaa, as there is yet another task waiting...
Level 9: Board the Imperial Battlestation[]
Cutscene[]
An Imperial freighter approaches the Death Star, which is hanging in space. In the cockpit of the freighter, 8311 holographically informs the Defiler that he has learned of this Imperial weapon via his position in Imperial High Command, and he wants the Defiler to board it and gather intelligence on it which could be sold to the Rebellion. 8311 also informs the Defiler that security on the station is very high, and this is possibly his most difficult mission yet. The Defiler smugly remarks that difficulty means nothing to him. Upon that, the freighter lands in an hangar.
The level[]
Fighting stormtroopers on the Death Star
This is a very difficult level, as most enemies on it are well-armed and armored. Raising the alarm will result in overwhelming amounts of enemies appearing, and given the corridor-filled nature of the Death Star, raising the alarm is not difficult. However, if the player manages to follow some maintenance droids, secret passageways can be discovered which serve as shortcuts.
Jandek calls in, and informs the Defiler that there is very little information on this battlestation and guidance will be difficult. Nonetheless, he informs the Defiler that some sort of computer terminal must be found. The player then must sneak up on any enemy and interrogate him to learn the location of the nearest computer core. Once that is done, the player must navigate corridors, fending off stormtroopers and sentry guns, to locate the computer core room.
Once the CCR is found, the Defiler downloads information on the battlestation, when the door bursts open and overwhelming amounts of stormtroopers enter. To escape, the Defiler dives through a grating in the wall and lands into a trash compactor. After fending off several dianogas, the walls begin to close, and the player must engage in a hacking minigame that is made more so difficult by a time limit.
After this is complete, the player must make his way along a catwalk network above a reactor core, whilst fighting off Viper droids and jetpack-wearing stormtroopers. Jandek calls in and tells the Defiler that the whole station probably knows about him now, and that a diversion is needed. The Defiler states that he will work on it, and then the player has to head to a detention center to free prisoners.
After arriving at the detention center, the Defiler frees the prisoners, starting a riot. Jandek then calls in to inform the Defiler that his newest priority is now to escape, as intelligence has been gathered. The Defiler states that this will be easier said then done, and the player now has to fight through hordes of prisoners and stormtroopers to reach a maglev train that travels through the superstructure of the station. Once the player boards the maglev, an on-rails sequence will start where the player will have to fight off attacking Viper droids and even walkers positioned on girders using an E-web blaster built into the maglev.
Once this is over, the player has to fight to the hangar through vehicle bays and fuel storage chambers. If the player explores enough, a slow but tremendously powerful AT-AT can be found that can more or less decimate all in its path. After this section, the hangar is reached, and the player must kill the stormtroopers surrounding the freighter. Once this is done, the freighter flies out of the Death Star, only to be pursued by TIE fighters. Another on-rails sequence begins where the player has to shoot down hordes of attacking TIEs. After this ordeal is over, the level ends.
End cutscene[]
The freighter jumps to hyperspace, and the Defiler tries to contact 8311, but gets no response. He tries to contact Jandek, but his voice is distorted by static, and all the Defiler can make out is a request to get to Nar Shaddaa ASAP.
Level 10: Fall of the Legion[]
Cutscene[]
The Defiler arrives on Nar Shaddaa to find the Legion headquarters under attack from Imperials. Landing on a platform, he shoots down some stormtroopers, and Jandek calls in. Jandek informs him that the Imperials have somehow learned that 8311 is head of the Legion. He then goes on to say that 8311 is dead and the Legion is finished. For a moment, the Defiler is silent, then asks what needs to be done. Jandek quickly says that Imperials are closing in and that he needs help. The Defiler loads his gun and enters the palace.
The level[]
Being the last level, this is the most difficult one. There are powerful enemies around almost every corner and overwhelming amounts of them too. The player also has a time limit to find Jandek.
After shooting through several corridors, the player will have to use missile launchers to bring down AT-STs rampaging through a hallway, and then must engage in a sniper battle with storm commandos. Nonetheless, the player must reach Jandek, and when that is done, Jandek tells the Defiler to escort him to the armory to gain weaponry.
During this section, the player must escort the unarmed Jandek through Imperial-infested corridors, and must also be aware of enemies that smash in through windows. Nonetheless, the armory is close, and Jandek is soon armed up, and now states that they must escape.
From this point, the number of enemies the player must face doubles, but with Jandek provides cover. Eventually, the player will reach a large hangar with several Legion ships on standby, but then an AT-AT will blast into the hangar, and serves as the boss.
This behemoth is almost unharmed by weaponry, and the player must use the guns atop the Legion ships to chip away at its armor. Once this is done, the player must rappel up a crane to jump on top of the AT-AT, while all the time avoiding fire and rappelling stormtroopers. On the roof of the AT-AT, the player must fend off flying stormtroopers before placing a bomb on the neck of the AT-AT and rappelling back down. Once the walker is down, the player and Jandek must board one of the transports.
Final cutscene[]
The transport takes away from Nar Shaddaa as Imperials overwhelm the palace. Wistfully, the Defiler wonders what he will do now. Jandek then states that there is a big galaxy, and besides, the Defiler has something worth a lot of money: the Laus.
Based on the player's overall score, the cutscene either ends there, or the Defiler states that Jandek need not be alone, and begins to take off his helmet. If the player got an especially high score, the Defiler completely takes off his helmet, revealing his face, which may come as a shock.
Soundtrack[]
The music for the game mostly consists of typical Star Wars-esque tracks with rock/heavy metal stylings. Some tracks bear a resemblance to the work of Frank Klepacki. This aspect of the game was criticised by many fans, who felt the rock elements unnecessary. Music in levels depends on the situation; if the player is in stealth, the music is slow and brooding; if in a firefight, it intensifies.
- Steel Legion theme-played on the main menu.
- Eradication
- Blue armor
- Snipe out
- Scum and villainy
- Duel of the Fates (remix)
- Corruption
- Kingpin
- Chainfire
- Heart of Steel
- Blackness
- Imperial March (remix)
Multiplayer[]
As in most games, Mutliplayer is divided between splitscreen and online. Several variations of multiplayer gameplay exist between the two modes, and many options exist to full customize multiplayer games. In both multiplayer modes there are about fifteen maps, which can be added to via a map editor in some versions, and over a dozen characters from the films and Expanded Universe, from Han Solo to Tyber Zann to Ferd Swqaru. Most maps are fully destructible.
Splitscreen modes[]
- Deathmatch--this is a standard free-for-all fight to the death, with the player with the most points being declared the winner. Vehicles are also selectable in Deathmatch. Team Deathmatch also exists.
- Capture the Holocron--in this mode, players have to grab a Holocron in the level and bring it back to a selected location, a la Capture the Flag. Like Deathmatch, a team variation exists.
- Secret orders--each player is given a different objective to complete, such as gathering a selected number of weapons or scoring a number of kills. The player who fulfills his or her objectives first is the winner.
- Demolition--all players have to cause as much destruction to the environment. The player that has reaked the most havoc wins.
- Base Delta Zero--beacons which can call down a Base Delta Zero are placed on the map. Players are split into teams and have to find these beacons and place them on the opposing team's base.
Online modes[]
- Battle--in Battle, up to forty players can engage in a free-for-all, with teams being optional.
- Assassination--each player is tasked with assassinating a different player by any means necessary. Some players might be tasked with killing the same player, and can hence team up, although at times assassination orders might change.
- BlackOut--more or less the same as Deathmatch, save the map is plunged into darkness. Each player has a torch with a limited battery, but batteries can be found scattered across the level.
- Suicide Mission--one player is given a nuclear charge and has to bring it to a place on the map, with all the other players having to stop him. However, said player is given double health, toughening the task.
- Spare Parts--parts for an artillery weapon are scattered around the map. Players split into teams and have to gather said pieces, which results in the other team being obliterated.
Reception[]
Star Wars: Legion Commando' was mostly well-received by critics and fans, although there were several almost unanimous complaints addressed at the game. Fans complained about the game's overall dark and gory nature, with some saying that this was not necessary for a Star Wars game. Complaints were also directed towards the soundtrack, which GameSport described as a 'strange mix of rock and John Williams tunes'. IGN also complained that the environments felt somewhat repetitive, and that most of the game seemed to spent in caves or dark metal tunnels. Comparisons were also drawn between the game and other games such as Halo, which some felt Commando was trying to ape. The AI was also critisised, with some reviewers pointing out that enemies in-game were either extremely stupid or almost impossible to beat. Reviewers also complained that the storyline was weak compared to other Star Wars games, with IGN saying that 'the story, boiled down, is basically 'guy goes around blowing stuff up. KOTOR it ain't.'
Nonetheless, there was an equal amount of praise. Fans welcomed the new premise of the game, and some liked the grittier take on the Star Wars universe. Multiplayer was also praised, with Legion Commando soon being one of the most-played games on Xbox Live. The game has also a popular tool for modding.
Some reviewers and fans have noted that the ending of the game leaves it very open for a sequel. Although there has been no official conformation of a sequel to Legion Commando, rumors of a sequel have abounded, and coupled with the game's considerable sales, the possibility seems very open.
Behind the scenes[]
This article was created when its Unit 8311 was inspired by viewing other fanon videogame articles and decided to make one revolving around what was then his flagship fanon storyline, the Steel Legion. Inspired by other FPS videogames, such as GoldenEye and Halo, he decided to promote it to GA status one day because he was bored.
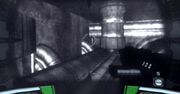
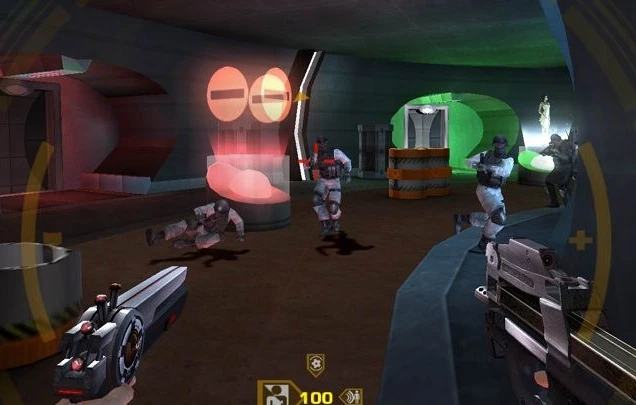
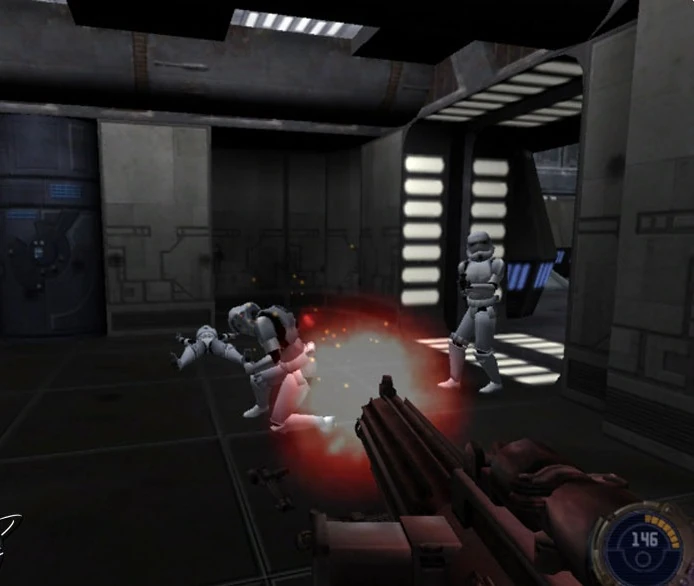
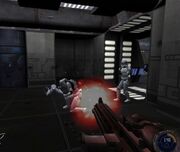
The 'screenshots' of the game are taken from GoldenEye: Rogue Agent, Star Wars: Republic Commando, and Jedi Knight II.